Today it is popular to swap modern parts into old hot rods. One popular swap is to upgrade the factory 3 speed automatics or 3-4 speed manual to a modern 5 or 6 speed transmission with over drive. Pre 1980’s cars typically had a final drive ratio of 1:1, these transmissions had no overdrive gears, thus can gain tremendous driving manors as well as fuel economy simply by swapping in a modern transmission.
The T56 manual transmission is a 6 speed with 2 over drive gears perfectly capable of handling up to 600 HP. Many claim the modern T56 called the “Magnum” will handle well over the advertised 600 HP limit. It is a stout transmission and its successor is still used today in a number of brand new vehicles. Luckily the company behind the factory intended T56 transmissions from the 1990’s to today also sells the transmission as an option for hobbyist as the T56 / Magnum.
A brief history of the T56 Transmission
The T56 was first introduced in the early 1990’s, designed specifically for the new Dodge Viper. The following years it was found in the 1993+ Pontiac Firebird and Chevy Camaro, as well as the Corvette from 1997+. In the 2000’s the transmission could be found in an array of cars made by various manufactures and car models including Aston Martin’s, Ford Mustangs, 2004-2006 GTO, and the Cadillac CTS-V. In the mid-2000’s it was replaced by the similar TR-6060 transmission, which has a lot in common with the original T56. The TR-6060 is still used in production cars including the Dodge Challenger and Chevy Camaro. More importantly, Tremec, the company that produced the T56 as well as the TR-6060 created a version of the TR-6060 specifically for hobbyists called the Magnum 6 speed in 2009. This is essentially a modern T56 with 3 shifter location options. Just last year (2019) Tremec released a new version, called the Magnum-F 6 speed, which is nearly an external clone of the 1998-2002 Firebird/Camaro T56 but with the modern internals. As Tremec creates variations of this wonderful transmission for hobbyists, we should see its use by hotrodders for many years to come.
Basic procedure for retro fitting and installing a modern T56 into a late model car or truck
This is the basic procedure for any T56 swap into a car that never originally came with a T56. These instructions assume you will opt for a hydraulic clutch setup for the most flexibility and that your car or truck will already have a clutch pedal that you can source for your swap, if you don’t already have one.
I broke these steps into 4 phases:
Phase 1: Prepare car for transmission
- Measure and cut initial hole in floor where shifter will come through. Be cautious not to cut too much as you cannot easily undo floor cuts.
- Bolt on the bell housing then T56 transmission to engine and jack up to the position where it will live once installed. Understand pinion angle here is important. It will make your life easier to do this step early on, before installing a flywheel, clutch and pressure plate. If you can hold off installing a pilot bushing or bearing that would also make it even easier to test fit your transmission.
- Make measurements where final cuts are necessary in your floor.
- Measure for, purchase/build, then install cross member.
- Measure for pinion angles and make adjustments as necessary.
- Unbolt the T56, followed by the bell housing.
- Make cuts to your floor to clearance your T56.
- Reinstall bell housing and T56 to test your cuts. This is now the opportunity to repeat steps 2-7 steps until you have the clearance you need. you should have at least 1/2″ clearance to accommodate movement and airflow.
Phase 1 will be where most of your time is spent.
Phase 2: Index bellhousing, install clutch, and index throwout bearing
- install bell housing with a centering tool to index your bell housing. I used the QuickTime Bellhousing Index Plates #RM-130 If necessary, order offset dowel pins. Follow the instructions that come with the indexing plate.
- Install pilot bearing or bushing
- install clutch with pressure plate. SEE NOTE BELOW ON CLUTCH CENTERING/ALIGNING TOOL.
- Install bellhousing
- Measure finger depth in relation to bell housing then depth with throwout bearing.you want to have 1/8″ clearance between the bell housing and throwout bearing, assuming you are using a hydraulic throwout bearing. See throwout bearing section for more details.
- Install throwout bearing and any spacers if necessary onto transmission, route hydraulic lines as necessary through bellhousing.
NOTE: USE A QUALITY CLUTCH CENTERING/ ALIGNING TOOL
Ram Clutches 03-013 Steel Alignment Tool
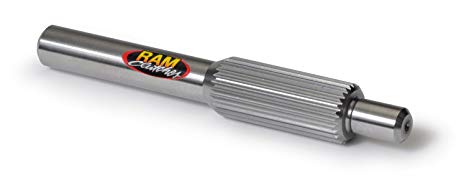
If you do not purchase a quality clutch alignment centering tool such as the RAM 03-013, you will most likely have installation issues. The cheap plastic centering tool that comes with a new clutch kit will most likely be too loose for the precision that this transmission’s shaft requires. If the clutch splines are just slightly off, you will not be able to slide the transmission into the clutch splines and pilot bearing/bushing. I personally spent 6 hours trying to re-align my clutch with the plastic alignment tool and failed every time. I’ve watched 2 different TV shows run into this issue, one kept re-installing the clutch and pressure plate until they were able to get it lined up, while the other took a perfectly good T56 Magnum transmission and cut the shaft off to use it as a centering tool because they only had 12 hours before shipping the car to a car show. You would think that I would have learned my lesson watching these TV shows, but I didn’t. It wasn’t until I spent nearly 6 hours trying to install the transmission that I finally broke down and bought the RAM alignment tool. Purchase this tool ahead of time, it will save you a lot of hassle, frustration, time, and money if you have a deadline.
Phase 3: Install transmission, cross member and driveshaft
- Install Transmission onto bell housing.
- Secure cross member and transmission mount for your application.
- Get drive shaft shortened or custom shaft made then install.
- Fill transmission with Dexron III transmission oil.
This is the last opportunity to check for clearance and pinion angles.
Phase 4: electrical, clutch pedal, and shifter
- Wire the T56 transmission appropriately for your application (reverse lights, lockout, VSS sensor)
- Wire a T56 Reverse Lockout Module to prevent accidentally shifting into reverse instead of 5th gear. See STRONGLY RECOMMENDED: T56 Reverse Lock Out Module note below.
- Connect mechanical speedometer (if required)
- Bleed clutch
- Install shift handle, shifter boot, and shift knob along with any center console/floor finishing mods
- Adjust clutch pedal
- install clutch bump stop to prevent clutch from bottoming out (if it is possible for your application)
STRONGLY RECOMMENDED: T56 Reverse Lock Out Module
Jegs 82513 Reverse Lock Out Module
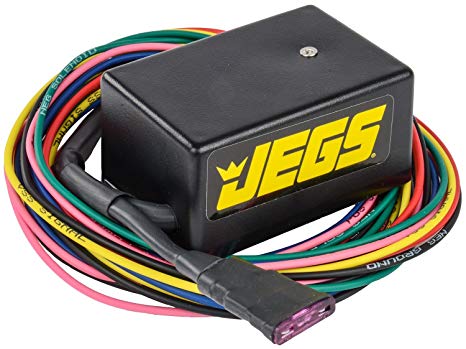
The Jegs 82513 Reverse lockout module will control the lockout mechanism built into the T56 by using the VSS signal to unlock a gate in the transmission shift mechanism to allow for the shifter to easily move to reverse when the car is not moving. If you do not install such a module, reverse is harder to move the gearshift into. With the module, the gate is locked even stronger when you are moving to make it more obvious while driving, preventing the driver from accidentally putting the car in reverse rather than 5th gear. When not moving, reverse can be shifted into as easily as the other 6 gears. Adding this module is a must in my book.
Test your T56 install
At this point you should be ready to rock. The first time you start your car, make sure the rear wheels are off the ground on jack stands for the following tests.
- Test you can start the car with clutch pedal engaged without the rear wheels moving. The remaining tests should be performed with the car running.
- Test you have plenty of pedal before the wheels start to engage
- Test speedometer is working when you press the gas while in gear
- Test that your rear reverse lights turn on when you put the transmission in reverse gear (assuming you wired this)
- Test that you cannot easily move the gear lever all the way to the right when the speedometer is showing speed (assuming you wired a reverse lockout module)
- Test that you can shift into each gear without any binding or issues
Once all of your testing of the car while off the ground is completed, you can turn the car off, check under the car for leaks and assuming everything is good, put the car down on the ground for its first voyage with your brand new T56 Magnum!
Tremec recommends driving the car for 500 miles with mild to moderate use. AKA do not start doing burn outs or quarter mile runs until you have gently broken in your new transmission!
Budget for T56 swap
I do not want to get too deep into pricing so the below are just rough numbers, your pricing will vary based on what you need to acquire for your swap.
- T56 Magnum transmission: $3,600 – $4,000
- Bellhousing, clutch and flywheel: $1,000 – $1,500
- Crossmember and transmission mount: $0 – $500 (you could make this yourself, re-use your factory cross member, or buy a kit)
- Hydraulic clutch, throwout bearing and related: $300-1,000
- Custom made drive shaft with appropriate yoke: $200 – $500 (depending on new or cutting an existing)
- Electrical, reverse lockout module, pigtails, wiring: $100 – $200
You can budget anywhere from $5,000 to $8,000 for a swap, not including labor.
Installing a T56 conclusion
If the above details scare you from such a swap, then join the crowd. Many classic restoration and hot rod shops prefer to swap in factory transmissions, or transmissions that at minimum fit into the factory sheet metal that can at minim use the factory bell housing.
Don’t be deterred however, searching the web is your friend. Specific model cars have been documented by others who have done the swap, paving the way for you to further prepare for and anticipate problems that may occur with your specific car.
If you are a hobbyist like myself and have done basic car work such as install a transmission or replace a brake booster, a T56 swap is completely do-able with your skill set. Remember to take your time and plan ahead as much as you can.
If you are still on the fence or want to know more about my T56 Magnum installation, stay tuned for next week’s post where I document specifics of installing a T56 into my 1981 Trans Am.
If you are still on the fence or want to know more about my T56 Magnum installation, stay tuned for next week’s post where I document specifics of installing a T56 into my 1981 Trans Am.
Related posts:
Installing a brand new T56 Magnum into a 2nd Gen Firebird Trans Am with Pontiac V8
Adding hydraulic clutch to 2nd Gen Firebird Trans Am / Camaro