Installing a hydraulic clutch into a 2nd gen Firebird, Trans Am or Camaro is not a simple task, but it can be done and the benefits are enormous. The optimal time to make such a swap is when you will be replacing the brake booster, as most of the work will require removal of the master cylinder and brake booster in order to add a new or modify your existing clutch pedal.
I Installed my hydraulic clutch while I was installing a Hydroboost power brake booster install in my 1981 Trans Am, then completed the install when I replaced my 3 speed TH350 automatic with a Tremec T56 Magnum (details of this swap coming in the next post).
I decided on going hydraulic as I was on the fence between doing a T56 Magnum or a TKO500/600 or maybe even sticking with a factory 4 speed. With a hydraulic clutch you can easily switch between various transmissions as well as not worry about the linkage interfering with the exhaust system. Future transmission swaps all I will have to do is connect the 4AN line followed by rebleeding the clutch and then call it done.
Options for 2nd Gen Firebird / Camaro
There are multiple options available for a 2nd gen hydraulic clutch swap. All options use the factory clutch pedal, which can easily be found at your favorite hot rod parts store. As for the hydraulic master cylinder, there are really only 3 options with 2 popular mounting brackets on the market.
Master cylinder bracket options
- Detroit Speed bracket – It is not as thick as the McLeod bracket but if you bolt or weld it to your firewall it will be strong enough. It will accept a factory hydraulic master cylinder from a 98-2002 Firebird/Camaro, as well as the factory or McLeod master cylinder. The McLeod master will require a plate for sealing.
- McLeod bracket – It comes with a kit, if you go with this bracket you will also use the McLeod master cylinder that comes with it.
- Make your own – I wouldn’t bother, the Detroit Speed bracket is not that expensive, just get that if you are on a budget.
Master Cylinder options
- McLeod master cylinder – This can be used with the Detroit Speed bracket but requires a custom plate to seal where the Detroit speed bracket has a gap.
- Tilton master cylinder – This can be used with and is designed for the the Detroit Speed bracket.
- Factory 98-2002 master cylinder – This can be used with the Detroit Speed bracket.
McLeod Hydraulic master cylinder kit for 2nd Gen Firebird / Camaro
I started out with a kit, the McLeod 1434005QD Hydraulic master cylinder and mount kit. The McLeod clutch master cylinder uses a Wilwood master cylinder and works well with a factory or factory like hydraulic clutch, which was what I planned on using.
The McLeod kit came with quality parts and a very nice machine aluminum mounting block for mounting the clutch perfectly with the clutch pedal. Their mounting bracket is very strong and thick and will not suffer from fatigue over time like others have complained about with other brand mounting brackets. The kit moves the clutch pivot point from the factory location which is centered with the clutch pedal to the left about 3/8″. This offset allows for the provided heim joint to be bolted to the side of the clutch pedal. This option is ideal that way the clutch pushrod does not collide with the clutch pedal arm.
Unfortunately I have a 1981 which has a blade style fuse box. I believe 1980 and 81 use blade fuses where-as 70-79 use glass style fuses which should provide more clearance for this kit. For the blade style fuse box the hazard flasher and right most row of fuses are very close to the clutch pedal arm. You cannot use the provided McLeod mounting bracket without relocating the fuse box.
Detroit Speed clutch mounting bracket for 2nd gen Firebird / Camaro
Out of desperation, I ordered a Detroit Speed clutch mounting bracket, part number 070430. From my research it appeared the Detroit Speed bracket placed the clutch pedal rod in the same location as factory, which is centered with the pedal. When the bracket arrived, I confirmed it is intended to use with the factory clutch hole, where-as the McLeod moves the clutch hole toward the fuse box by 3/8″.
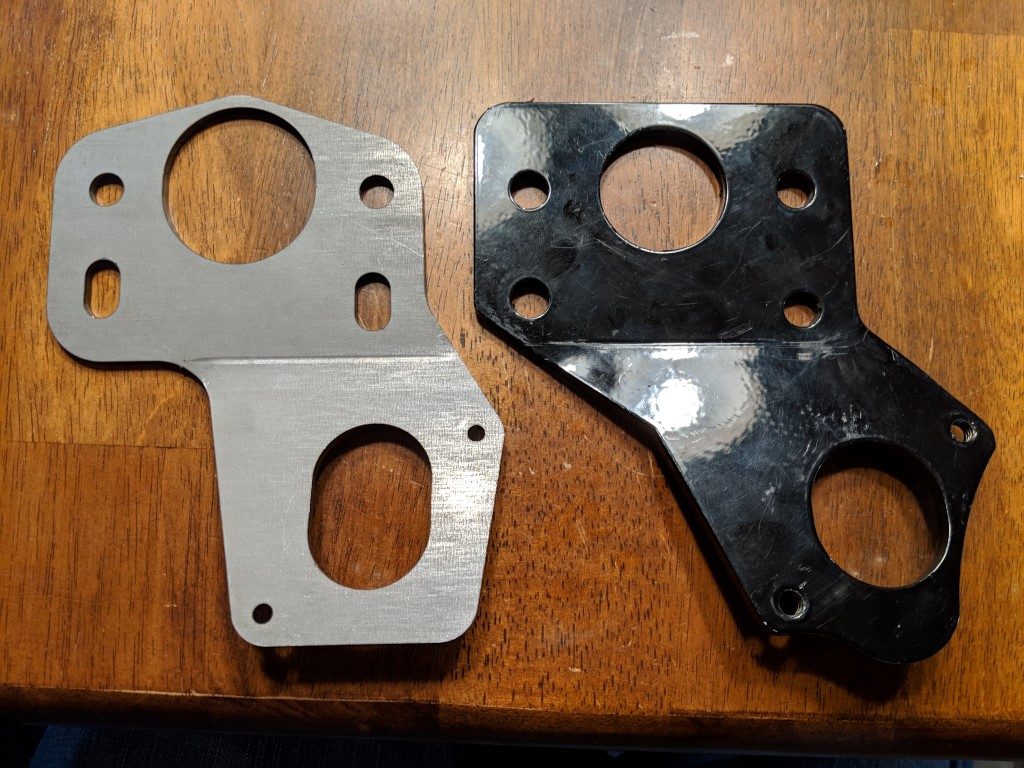
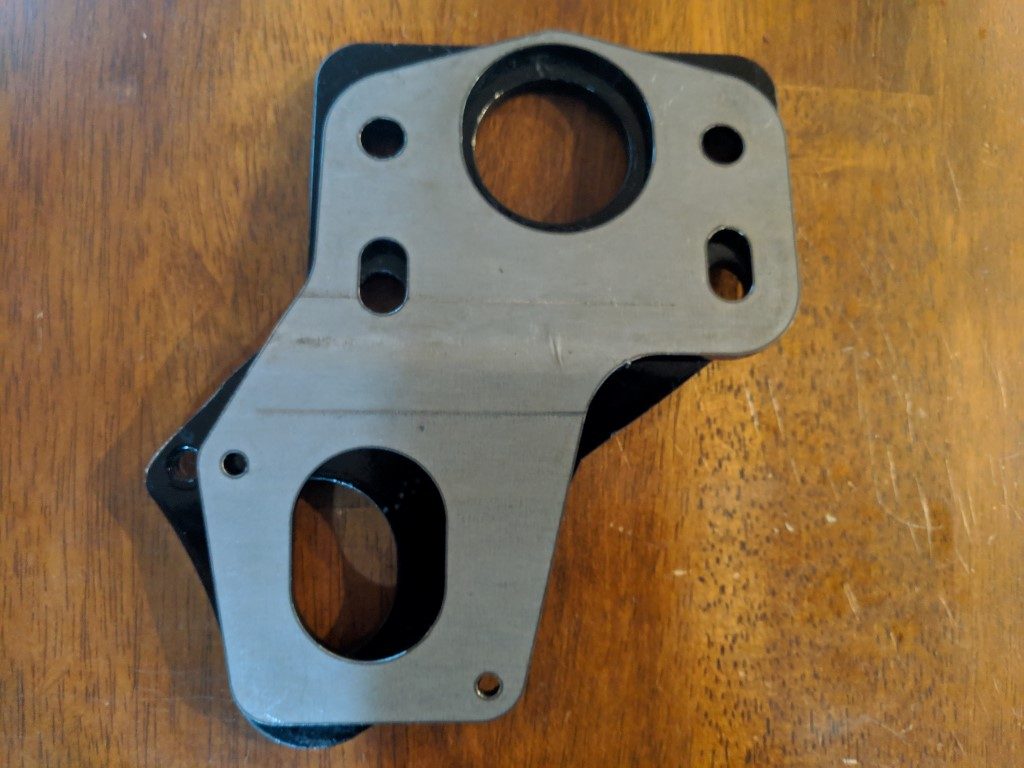
The Detroit Speed mounting bracket is about 1/2 the thickness of the McLeod bracket. Though I do not foresee a strength issue, if you are concerned about strength along the firewall, I strongly recommend the McLeod bracket if you can mount it.
Interestingly, both the Detroit Speed and McLeod mounting plates can work with a factory 4th gen Firebird/Camaro hydraulic clutch.
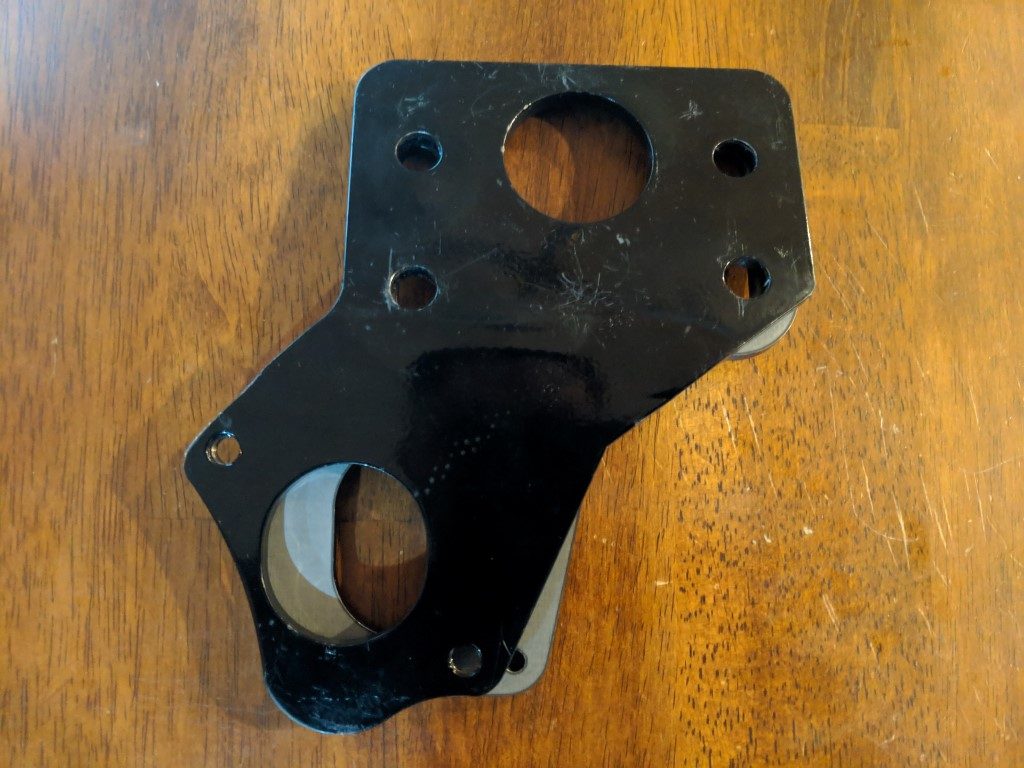
The Detroit Speed mounting bracket is designed for the Tilton clutch master cylinder and bracket adapter kit which has a larger footprint when bolted to the firewall. Because of this, the opening is larger. When placing the McLeod mount over top it left a large gab. To solve this, I used sheet metal to act as an intermediate plate between the Detroit Speed mounting plate and the McLeod clutch.
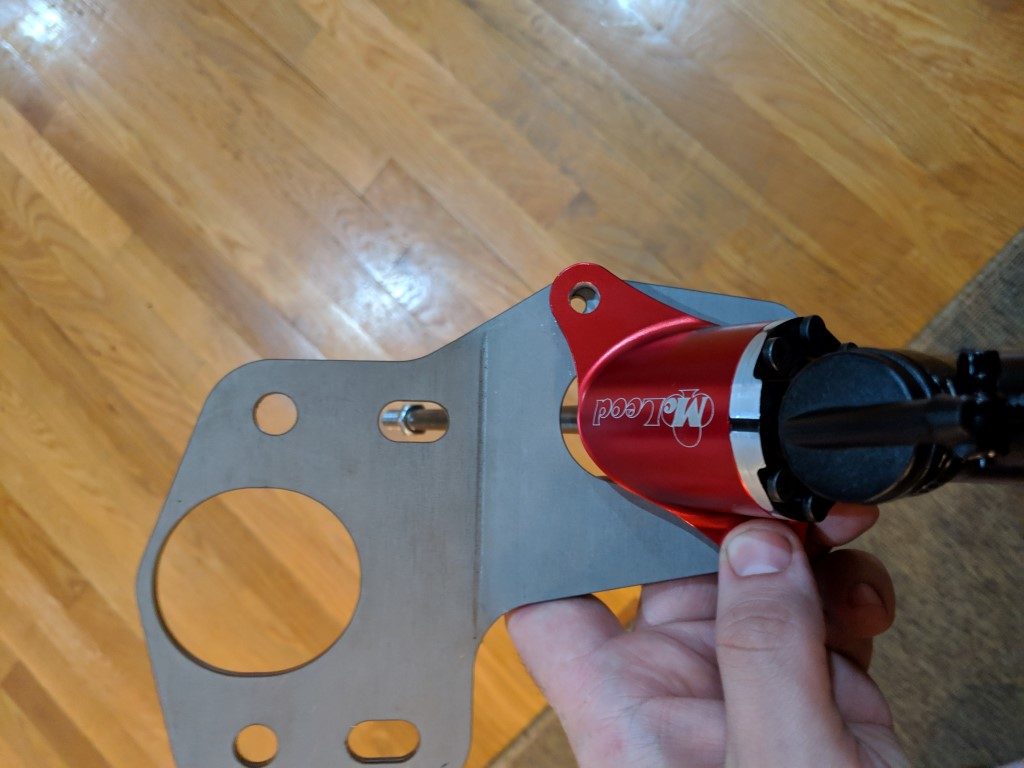
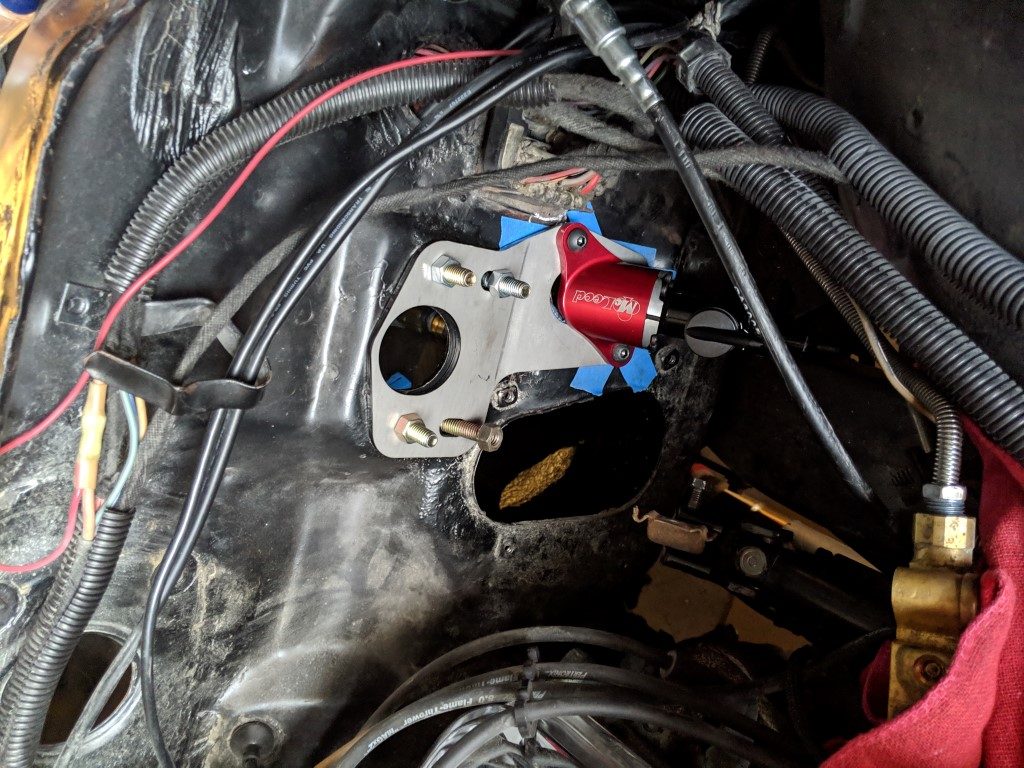
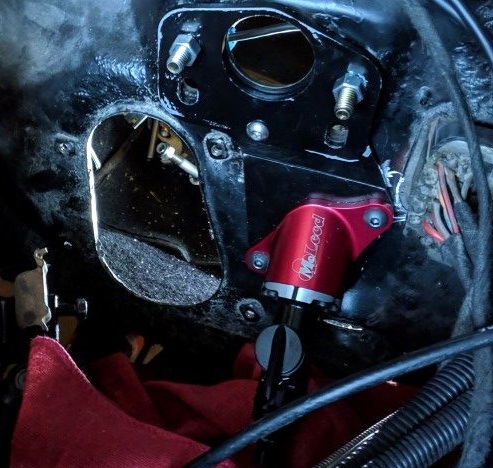
The final result with bracket painted with a special made plate between the Detroit Speed mounting bracket and the McLeod master cylinder.

Note that I drilled the 2 holes for the master cylinder to accept 1/4″ button bolts both thrugh the bracket and through the firewall to provide a tight fit of the plate against the firewall. I also removed a rubber bumper that was centered for the brake pedal and drilled through the bracket so i could use a button bolt at this location as well. This is seen in the above picture just below the 4 bolt holes for the brake booster.
Drilling new hole in firewall
If there is a section you read from this article, it better be this one. Read carefully. There are two scenarios, either you already have a clutch pedal and a hole for it, or you do not because you are swapping in an automatic transmission. Either way this may also influence which kit you install and how you install it.
If you already have a clutch hole for a clutch pedal, and you do not wish to possibly modify the existing hole, you should go with the Detroit speed bracket. The Detroit speed bracket puts the clutch in the exact same location as the factory did. The McLeod should also clear but it may require filing of the factory hole depending on your situation as it is offset 3/8″ further toward the fuse box.
If your firewall DOES NOT have a hole for the clutch pedal to go through the firewall, you will need to drill one. the firewall has 3 dimples at the location where the clutch hole is located. It may be hard to locate but the dimples are there. The middle dimple will be slightly bigger than the outer 2. The outer 2 are intended for sheet metal screws that will hold a boot to seal against the firewall for the mechanical clutch rod to ride inside of. The center slightly bigger dimple is the centering hole where you will drill out a 1″ or larger hole. I believe the factory made this hole 1-1/2″ wide. The factory boot diameter is 1-13/16″ in diameter, more than 1-3/4″. Factory wise, you have a lot of variance.
WAIT!!! Please read the rest before you put the hole in the wrong spot!
If you went with the McLeod kit, DO NOT drill the factory location. If you already have a hole for your clutch, it should be big enough for the offset of the McLeod but you may need to file the hole slightly larger toward the fuse box.
If you went with the Detroit speed bracket, you can use the factory location without issue and drill it out to 1-1/2″ opening.
With either the McLeod or Detroit speed bracket, the optimal method is to bolt the bracket to the firewall and find the exact center where the clutch rod will go through, offset that slightly upward (as the rod will angle upward), then drilled a 1″ hole exactly where you need it.
I opted for the Detroit Speed bracket and my hole is only slightly about 1/8″ toward the fuse box of where the factory centering dimple was found.
For both brackets you may need to add seam sealer around the bracket to seal-in the engine bay to your mounting plate. I ended up not needing this as I used a smaller 1″ hole and drilled out the Detroit Speed 2 master cylinder mounting holes and also drilled through the firewall and used lockouts within the inside of the firewall to both hold the master cylinder and the bracket tight against the firewall. This added both strength and sealed the plate against the firewall.
Adding Clutch Pedal
Adding a 3rd pedal to a 2nd gen Firebird or Camaro is actually quite easy to do. The factory made it easy on themselves, all they needed to do was mount a 3rd pedal to the left of the brake pedal. Essentially a longer bolt for the brake pedal is used and the extra length covers the width of the clutch pedal. There are differences between the years, though those differences appear to be specific to the pedal size at the bottom, not the pedal arms or how they mount, which means any 70-81 clutch pedal + brake pedal assembly will work, as long as the brake and clutch pedals work together. See my final parts list at the bottom of this post for the pedal assembly I purchased.
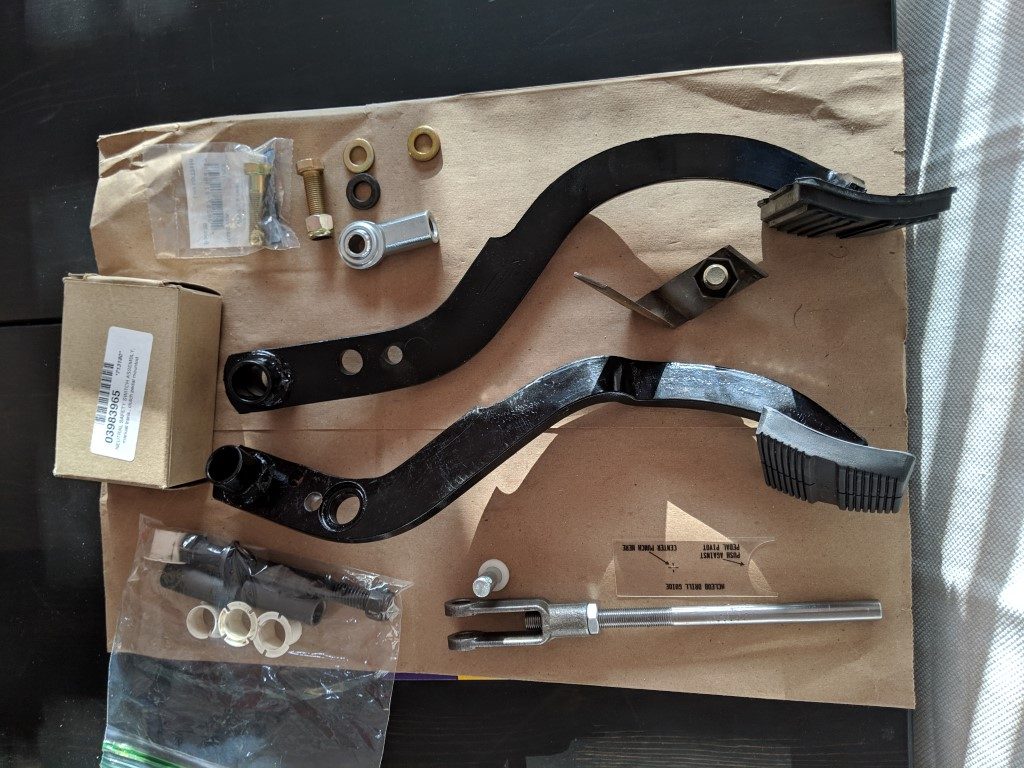
Above you can see that I had to add additional threads to the push rod extension that came with the McLeod kit in order to use the fork shaped clevis joint I purchased as the Detroit Speed relocated my clutch centered with the clutch pedal. I had to use a fork shaped clevis to attach to the clutch pedal arm for this situation.
Neutral safety switch
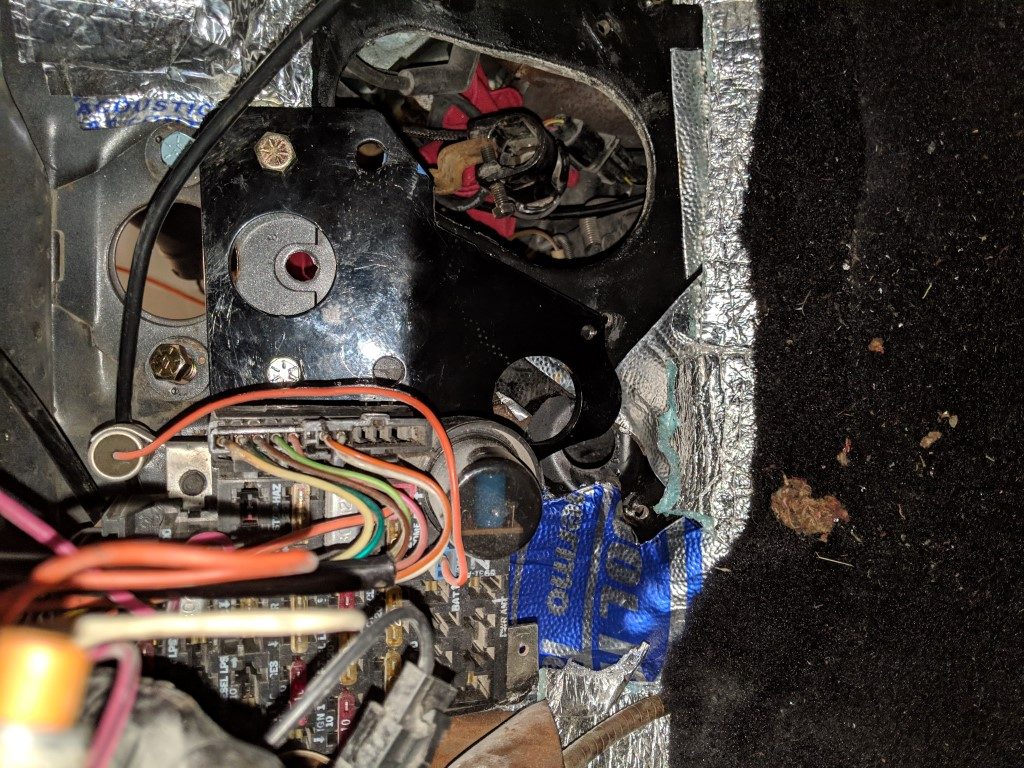
Doing some research I found that earlier Camaro and Firebirds 1970-1978 included a neutral safety switch that easily bolted to the clutch pedal and top of the factory reinforcement for the steering column. Unfortunately you will need to source the switch and switch pivot mount from different sources, no one sells both together for the 70-81 Firebird/Camaro.
Wiring of the neutral safety switch is simple. I purchased 12 gauge purple wire and cut the purple wire coming from the ignition switch wiring to my steering column and ran each end to the 2 connections to the neutral safety switch. The circuit is only complete when the clutch is depressed. Safe and simple, just wish the parts were easier to source.
Since I purchased these items, I now see that Firebird Central has both parts available, though as separate items. I ultimately purchased the pivot bracket and the neutral safety switch from separate eBay vendors.
Firebird / Camaro Neutral Safety Switch
- GM part number: 3983965
- Firebird Central part number: DAS-288
- Ames Performance part number: FM364D
Firebird / Camaro Neutral Safety Switch Pivot Bracket, the harder to find part
- Firebird Central part number: CLU-72
- The Stop Shop: TSS263
Hydraulic Throwout bearing for T56
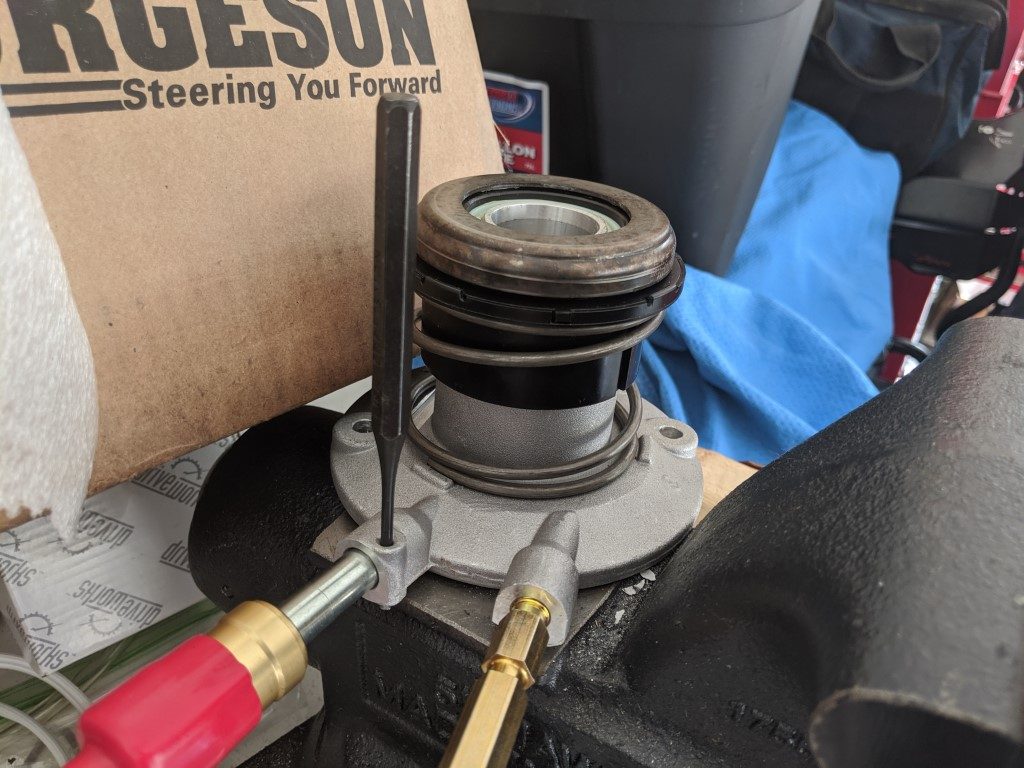
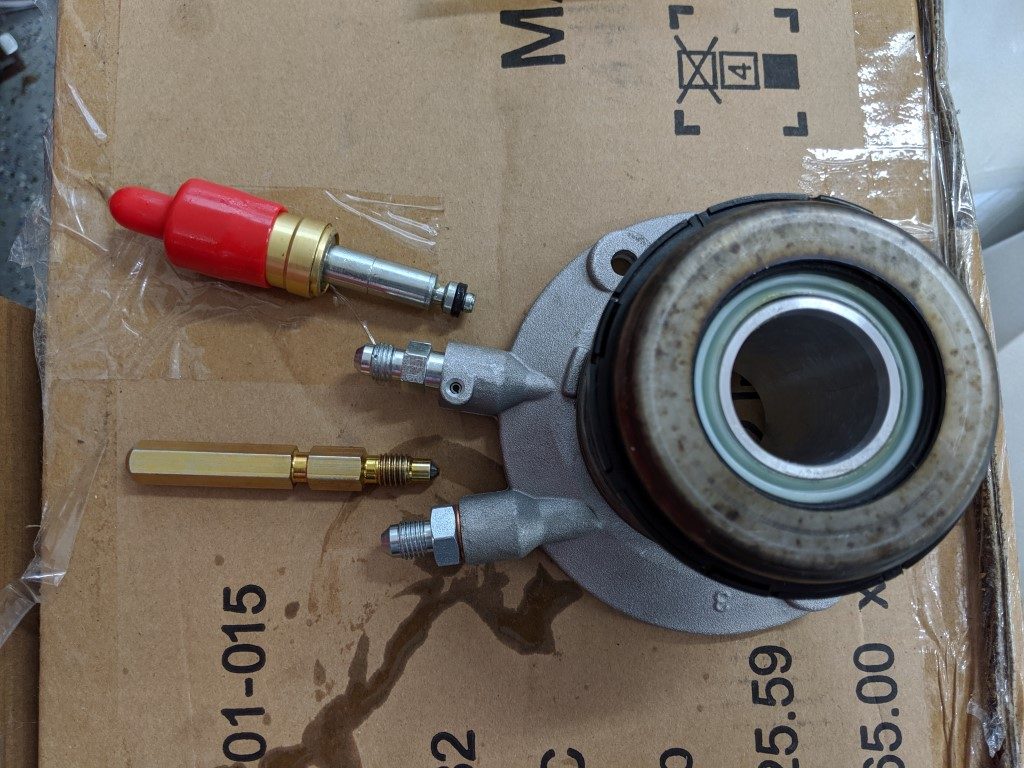
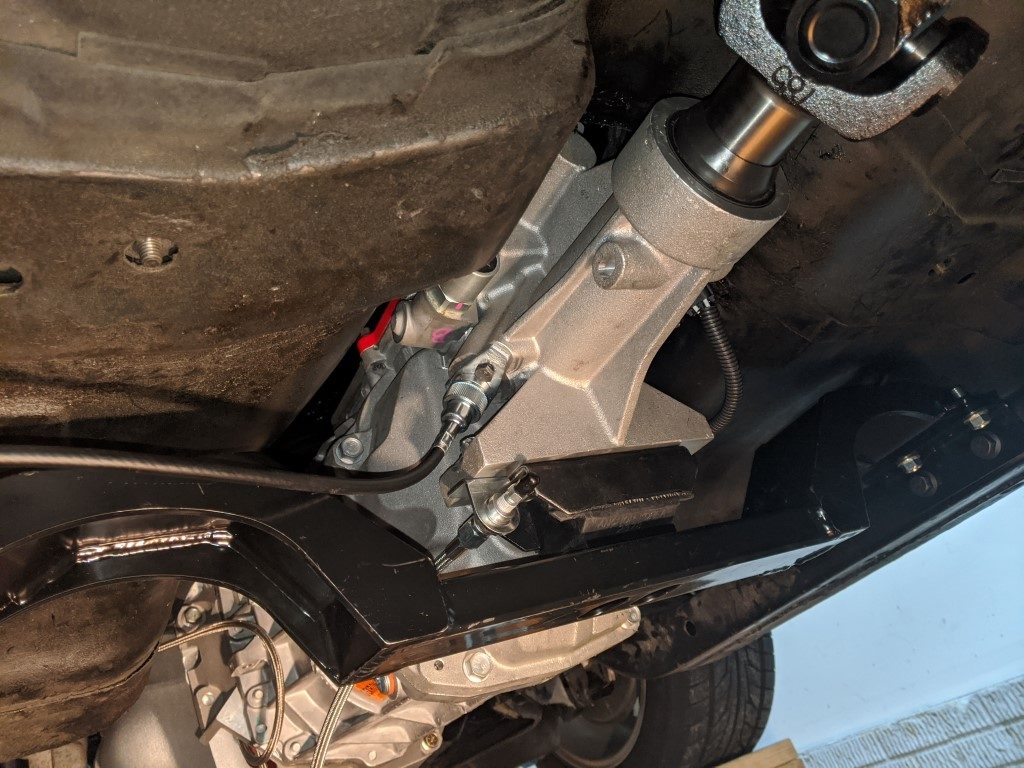
When I opted for a T56 Magnum, I decided to go with a Luk factory OEM throw-out bearing that would match with the volume provided by the McLeod master cylinder (and also a factory clutch master cylinder). The only problem is the factory throw out bearing uses factory style push-lock connections. As I assembled my transmission with the T56 bell housing I quickly discovered clearance issues with using the quick disconnect that protruded from the throwout bearing. To solve this, I converted the lines from the throwout bearing to 4AN with 4AN adapters and used 90 degree elbow 4AN lines to provide clearance.
Changing the line into the throwout bearing requires the removal of a roll pin. Once the roll pin is removed you can slowly pull out the factory quick connector and replace with a clutch to 4AN adapter. There are a few brands that provide such an adapter which can also be used to convert a factory clutch master cylinder to 4AN line as well. I research and tested 3 and decided on the Jegs version as it seemed to fit snug. The Jegs version had the gasket pushed into the wrong location however. If you go with the Jegs version plan on slowly pulling the rubber seal off completely then re-seat it at the tip. For what ever reason whom ever is stuffing the packages for Jegs is not aware how this adapter seals and the 2nd gap is for the roll pin to hold it in place, it is not meant for the rubber seal.
The bleeder screw was also replaced with a 4AN adapter. This allowed me to run a regular 4AN line to a remote mounted bleeder. I used a Russell Hydraulic Clutch Speed Bleeder, it includes a bracket for mounting like a brake hose.

Parts numbers:
- 1998-2002 Firebird/Camaro T56 Throwout bearing, LUK LSC265B
- Allstar Performance Adapter Fittings -4AN Male to 10mm x 1.5 Male ALL50036
- 18″ and 24″ 4AN hydraulic braided hoses
- Russell Hydraulic Clutch Speed Bleeder Assembly 641380
- Earl’s 4AN Clutch Adapter Fitting LS641001ERL (did not like the fit of this one)
- Jegs 4AN Clutch Adapter Fitting 601132 (ended up using this one)
- Russell 4AN Throwout bearing fittings 641001 (This one did not come in time but looks almost identical to the Jegs version with slightly bigger opening)
Summit Racing has a Clutch Adapter Fitting as well but it is 3AN.
I almost switched to the
Tilton Throwout bearing
When I first ran into clearance issues with the LUK factory throwout bearing (before I discovered converting the lines to 4AN), I went to the store and picked up the Tilton throwout bearing 60-6105. I loved the flexibility with adjusting this throwout bearing and it has an interesting way to lock in the correct position so you have pretty close to the 1/8″ gab between the throwout bearing and the fingers of the pressure plate when not engaged. Unfortunately while reading the documentation I found that I needed to use the Tilton master cylinder which has much more volume then the factory or McLeod master cylinder,. Going with the Tilton would mean I would have travel issues as the throwout bearing’s hydraulic fluid volume requirements would be bigger than the master cylinder could provide.
Learn from my mistakes!
I learned a lot in the process of using the McLeod kit as well as finding out how the Detroit Speed / Tilton kits work together, and how the factory master cylinder can also be used. Based on my experience, this is what I would recommend for 3 different scenarios…
- Budget minded hydraulic clutch: Get a factory 1998-02 F body clutch & factory LUK throwout bearing and use a factory clutch line. If you cannot use the factory clutch line, switch to 4AN lines and use the throwout bearing to 4AN fittings to convert the fittings on the master cylinder and throwout bearing.
- 1970-1979 Firebird/Camaro: Go with the McLeod setup, the mounting plate is much thicker and the master cylinder provides the most flexibility with either the McLeod throwout bearing or a factory throwout bearing.
- 80/81 Firebird/Camaro: You almost have no choice, either go with the Detroit Speed bracket with a factory throwout bearing with a factory master cyinder or mcleod master cylinder, or go completely Tilton master + throwout bearing.
Remember, if you use a Tilton master cylinder, you need to use the Tilton throwout bearing, and if you go with a Tilton throwout bearing you also need to use the Tilton master cylinder so the volume of hydraulic fluid between the two sides of the system are paired together.
Bleeding the system
At first when I started to bleed the system I was not seeing any fluid coming through. I ended up taking the bleeder screw completely out and then pressing the clutch a couple times to pull in plenty of hydraulic fluid. Once I got the system filled with fluid, i then re-inserted the bleeder screw then cracked it open slightly to utilize the built-in check valve. From that point, bleeding the system went very quickly.
Hydraulic clutch results
Amazing! The clutch pedal is smooth to press and has solid engagement with my T56 Magnum. Once I figured out the bleeding, the process went fast and I have not had any hydraulic leaks or issues with the clutch. Watch for my next post as I write up installing a T56 Magnum into my 1981 Trans Am!
Related posts:
Installing a brand new T56 Magnum into a 2nd Gen Firebird Trans Am with Pontiac V8
Installing a brand new T56 Magnum into your hotrod or classic muscle car