Another month has come and gone, and progress on the Trans Am is slow but steady! This post is an outline of everything that has been happening since in April, 2012.
Drivers Door Done!
This was a three part project. As described in last months update, I had to rebuild the hinges as well as fix the window guide. I rebuilt and installed the remaining lower hinge, re-installed the window with the new window guide and then finally spent some time adjusting the window. I had to use the car battery directly wired to the window motor to power the window up/down. The door now closes like a new car and the window lines up with the roof line perfectly! Also good news, there’s nothing wrong with the power window motor, the window goes up and down quite fast when directly wired to the battery. Sometime this summer I’m going to wire in Bosch style relays and new ground wires to the window motors that way I can enjoy fast up/down power windows like a modern car!
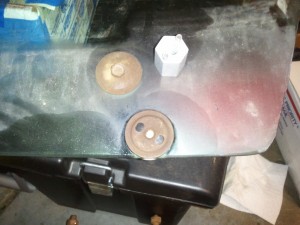
Here’s a photo of the back of the window guide I replaced with the window guide nut tool above.
Brakes
Like all projects it seems with this car, further tear-down and investigation leads to more work! As I got ready to install the front calipers, I discovered the calipers I got from NAPA were completely wrong. NAPA took care of me, and now I ordered remanufactured Cardone calipers instead of the NAPA house brand. I also ordered rear calipers, and pretty much everything else! Yes, I’m now replacing everything with the brakes.
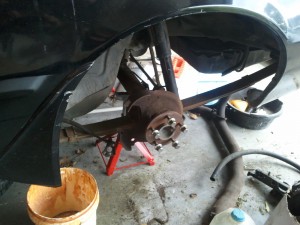
I was hoping to re-use the emergency brake brackets and cables, but once I got the rear calipers off the car I quickly found that the rear rotors were machined beyond their tolerance and the caliper pistons were bottomed out, causing the emergency brake bracket attached to the top to wear and no longer engage the ratcheting system in the caliper. Basically, this car was running without rear brakes, one caliper in the rear was definitely not grabbing and the other one was questionable.
Here’s a list of all the replaced parts:
- Remanufactured Calipers, front and rear by Cardone
- New Brake lines by Inline Tube, plus new rear brake lines with hoses by Right Stuff Detailing
- New brake line to hose brackets by Jegs
- New brake hoses, 2 for front brakes plus one from brake line to rear drive shaft (in addition to Right Stuff Detailing hoses)
- New Banjo Bolts by Dorman
- New all wheel disc brake proportioning valve by Right Stuff Detailing
- New brake pads and rotors by Raybestos
- New Master Cylinder by EIS
- Remanufactured brake booster by Cardone
- Emergency Brake brackets for 79-81 WS6 rear disc brakes by Scarebird
- Emergency brake cables by Dorman.
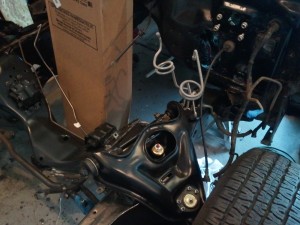
I think that covers it, other than brake fluid, anti-seize and high temp lubricant for brake calipers. I’m dropping a lot of money into the brakes, but I think it’s a good investment. All the existing brake parts are 30+ years old, so it seems only fitting to replace it all. Here’s a picture of the firewall painted and ready for the brake booster and master cylinder. I started fitting some of the brake lines in anticipation. The second picture is of the rear axle with the calipers off. The plan for now is to replace the brakes and the rear shocks. Next year I’ll replace the springs, rebuild the posi rear end and install new bushings for the springs and stabilizer bar.
Test Fit 78 Rear Bumper
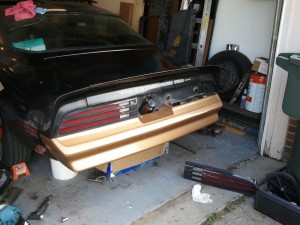
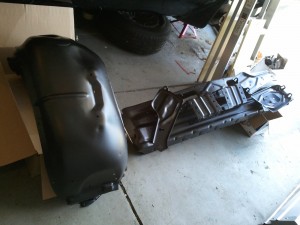
Part of this project is to convert the 1981 Trans Am to look like a 1978/77 Trans Am. Not only are is front bumper different, but so is the rear. I did a test fit and confirmed that you can swap out the steel bumper from an 79-81 with a 77/78 steel bumper. The tail lights and license plate gas door are different and requires a shorter gas tank filler neck. The bumper will be painted black when I take the car in for paint.
Bumpers & Inner Fender Wells Blasted and Painted
I got the metal bumpers and inner fender wells sand blasted and painted! If you need sandblasting services, contact me and I’ll send you my contact in Delaware, OH. I got both the front and rear bumper as well as the inner fenders blasted and primed with a PPG epoxy primer for a great price!
Memorial day weekend I top coated all the parts with satin Eastwood Extreme Chassis Black so it matches the rest of the frame and under body. Everything looks good!
Steering Linkage Painted
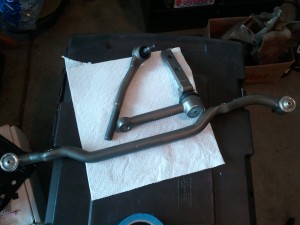
I started painting the steering linkage with engine Dupli-Color engine enamel. I got cast iron gray engine paint for them, as well as the engine enamel primer and they turned out pretty close to the natural finish! The Tie-rod ends I got were ACDelco brand which have a really nice finish, so I decided not to paint them. All the parts you see in the photo are Moog/Federal Mogul. All that’s left is the steering box and pitman arm.
Jack Stand Recall
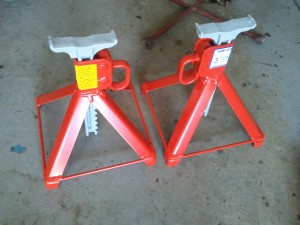
Last fall I bought new OTC 6 ton jack stands. I decided on OTC since it’s a brand name. Unfortunately for me, the jack stands last month were recalled. I had to buy another set of jack stands in order to ship back the ones I bought to fulfill the recall. I did a little research and decided on a set of US Jack stands, each stand is rated 3 tons, where-as most other manufacturers rate stands by the pair. These new US jack stands are nice and I feel a lot more confident with them under the car. At first the base was not flush on the floor, but once I put some weight on them they leveled out quite nice. The paw on the side has 2 teeth to hold into the gray stand portion, you can’t easily disengage them without putting forth effort, which is a good thing.
What’s Next
Brakes, brakes, BRAKES! I have to have the brakes done this June! As soon as the calipers and remaining parts arrive, I’ll be painting the calipers with VHT black caliper paint then installing the brakes, lines and components front to back. While doing the brakes, I will also be re-installing the fuel lines, steering linkage and gear box. Hopefully by July 4th weekend I’ll finally be preparing the engine and transmission for the car!
