I’m now 22 months into my 1981 Pontiac Trans Am and it feels like I’ve got nothing done! But this blog post is a good outline of everything that has been happening since November, 2011.
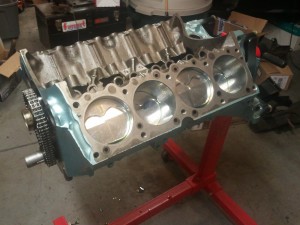
Short Block Assembled
The hiccup with the wrong piston valve relief was sorted with the machine shop relatively quickly. After getting the short block assembled in December, I went over my notes and decided to research one of the other concerns I had during assembly. I found that I did do something wrong with the ARP wave-loc connecting rod bolts. In a pinch I called Don at DCI Motorsports and he helped me out big time! He fixed my problem without putting a dent in my wallet. He’s a real Pontiac expert and DCI Motorsports will be getting all of my Pontiac business for now on! As far as what I did wrong, I’m rather embarrassed so don’t ask! All anyone needs to know is it was my fault and it’s fixed now. Oh and I’m never ever going to build another engine with ARP Wave-loc bolts, too much hassle to deal with in a stock engine build.
The short-block is done and the cam and timing chain is installed and degreed! The remaining engine parts will be assembled within a week before I plan on starting the motor. Waiting till the last minute will allow me to inspect the internals one last time. The remaining assembly should not take too long either.
New Years Eve Engine Break-in!
On New years eve morning I went over Joel’s to help him with his engine break-in. Talk about the best new year eve ever, I got to hear a freshly re-built Pontiac start for the first time! Joel planned on doing the break-in the night before, but with all the stuff going on that night with the kids I wasn’t able to come out. Luckily he didn’t get everything setup till late that night so he delayed the break-in till morning. Between monitoring for leaks and checking for other problems, it’s a good idea to have at least one buddy around during the break-in process. It’s definitely exciting, not as exciting as child birth but its definitely a car’s equivalent!
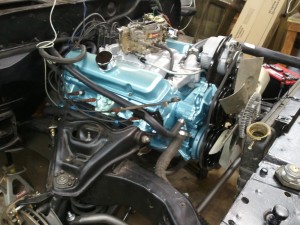
Here’s a pic of Joel’s 400:
My 400 once assembled will looks very similar to this.
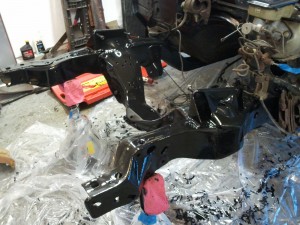
Front Chassis Ready
It took a lot of time, but I got the front sub-frame painted! I used Eastwood Rust Encapsulator as a primer and Eastwood Extreme Chassis Satin Black as the top coat. I applied it with roller and sponge brushes. It turned out great! All rust spots I ground down with the angle grinder, all other spots were roughed up with 320 grit paper, cleaned with Simple Green and then dried with paint thinner before painting.
Once the front suspension is back on the car my plan is to wheel the car out and apply Eastwood Underframe Coating to the inside of the chassis. I now think I should have done that first.
Front Suspension
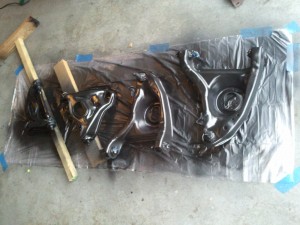
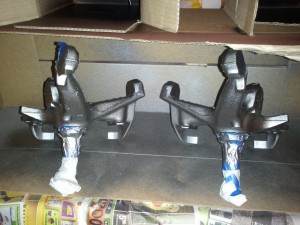
The front suspension is ready for re-assembly! In December my buddy Joel helped me remove the A-arms, spindles safely from the chassis. The process rquires compressing the coil springs. Joel also had a set of chains to use as an extra level of safety in case the spring got loose. Once the arms were removed, they were sand blasted then I gave them a light coat of Rust Encapsulator. Then my friend Tim pressed out the old bushings and pressed-in new ones. I went with stock OEM rubber bushings. The ball-joints were also replaced and new lower ball joints were pressed in. Thanks Tim! If you live in the Delaware Ohio area with a classic car and need a mechanic, please contact me, I’ll give you Tim’s contact info. He knows his muscle cars!
I also cleaned and painted the spindles and brake shields with Eastwood Brake Gray. The shields were a pain in the butt, I first had to find a replacement for the drivers side since it was mangled for what ever reason. Then in the process of grinding off rust on the replacement I damaged it. I ended up buying a pair off eBay. Honestly I should have just bought the pair off eBay in the first place, the time I spent cleaning the rusty one I found wasn’t worth the time or effort when it was all said and done. Lesson learned, some stuff you restore, some stuff is easier to replace.
As far as the suspension is concerned, it is primarily stock. I went with 590 Moog springs, which are correct springs for a 1981 Turbo Trans am, but cut 1/2 coil off to compensate for the lighter engine (Pontiac 400 without AC). The 1/2 coil should help lower the front end slightly so it has a more hot-rod look. I also got Edelbrock ISA shocks for the front and rear. The anti-sway bar will remain stock, which is already a hefty 1-1/4″ thick, but I did upgrade the bushings on the links to polyurethane. All other bushings are rubber.
Steering Column
I just started working on this. I already purchased a new turn signal mechanism because the left turn signal will not engage. After taking apart the steering column I have discovered that there’s nothing wrong with the steering column turn signal mechanism, the problem is with the pivot pin that holds the turn signal lever. So now I am in the process of finding out how I can fix this, at the moment I am not finding anyone who sells a replacement “pivot pin” for 1981 Firebird. I am going to take the steering column apart completely to tighten the tilt mechanism and re-grease the bearings. I will also be painting the column black while it is apart.
What’s Next
The plan now is to start re-assembling everything! First is the front suspension, then I can paint the inside of the front frame. Once the weather breaks, I can start installing sound deadening and insulation along the firewall, followed by re-installing the heater box, dashboard, steering column and other firewall items. Once that’s all done, I can start thinking about getting the engine together and installed!
