This was a big month for the Trans Am!
Brakes
They’re done, but not without a fight!
At the last minute I deviated away from my original plan of running Metallic brake pads all around after reading in the service manual as well as on the popular Firebird, Trans Am and Camaro forums that the rear should have organic pads installed. What sold me on the switch was a comment that the car stops easier and the emergency brake holds better with organic pads.
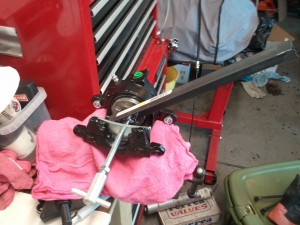
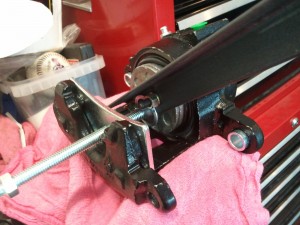
I had a hard time rotating the caliper piston to align a D shaped key way for the brake pad to rest in. After struggling with the problem for a few days and researching that GM had their mechanics use a special spanner pin wrench, I decided to make my own wrench out of 1″ L stock steel and 2 button head screws. It worked like a charm.
I then had a problem with the passenger side caliper being incorrect. I found after I had it installed on the car that the emergency brake ratcheting system was reversed, it was setup for a drivers side not passenger side. This pretty much wasted a good day running around town looking for another caliper.
Once I had the calipers installed, I ran into another snag with the front emergency brake cable that runs to the emergency brake pedal. Out of desperation I promptly went to NAPA only to find their cable had the same thread issue. The mechanic at NAPA measured the thread pitch and diameter and discovered it was M14-1.25. I then went back home and searched Google where I quickly found this was a problem with almost all the popular brand brake cables. Makes you think maybe these parts are all made in the same place. I ended up going to The Right Stuff Detailing here in Westerville Ohio to get the cable, which looks more like the original cable that came off the car than the aftermarket cables everyone else sells. This is the third time The Right Stuff bailed me out due to parts I otherwise would have to order online, I’m very glad they’re located here in Columbus. The front brake cable provided by The Right Stuff came with a correctly threaded 9/16″ nut and installed in less than 15 minutes.
My car is currently using the original rusty brake cable for now, I will switch back to the Right Stuff cable once I am ready to installing the interior.
Once I got the emergency cables all connected, adjusting the emergency brake was actually quite easy. I used zip ties at the rear calipers to hold the emergency brake levers in lock position, then attached the cables. I then did the brake lever in the car a few times adjusting the nut on the front brake cable until it was where I wanted it. Then I cut the zip ties at the calipers for final testing and adjustment. Without the zip ties, it would have been hard to connect the front cable with the rear cables.
Bleeding brakes went smoothly, It took me about 3 hours to do, including a run to the store to get another bottle of brake fluid. Bench bleeding the master cylinder was a real pain. It seemed like I was finally bubble free, then another little bubble would appear out of no where. I initially gravity bled the system till there was fluid at each caliper. Then I switched the bleeders with Russell speed bleeders and used their bleeder bag system to finish bleeding the brakes. I did have 2 leaks at two connections, I was running aroudn re-tightening brake lines, but that was expected. I did not want to over-tighten and possibly damage the lines. Speed bleeders are definitely the easiest way to go about bleeding brakes.
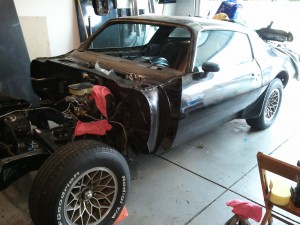
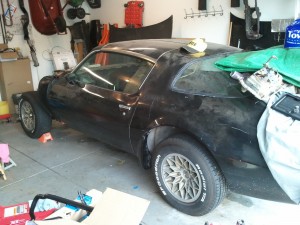
The car has been on jack stands since December, so it’s nice to see the car rolling again!
AC Delete
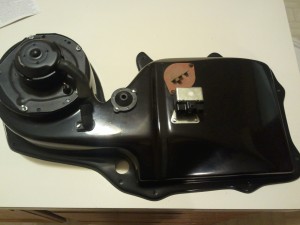
I have a love/hate relationship with the AC Delete cover I got. I was chatting on the Trans Am forums about the 2 popular AC delete covers and half way through working on mine I came to the conclusion that perhaps the other style that’s made of plastic may be better than the fiberglass one that I got. There are benefits to both, regardless I always wish I have the “best” solution for the situation. I’m still not sure what’s the best AC Delete, they each have a particular purpose depending on what the car builder wants to deal with.
Since I have a fiberglass AC delete, I decided I will paint the unfinished side that way there are no fiberglass fibers possibly getting into the car’s ventilation. Other than some of the dimpled holes not quite lining up, it fit pretty well. If I had to do it all over again, I’d try the other plastic AC delete.
Just need to put a coat of Krylon Fusion satin black on it, and install.
Front Windshield Out
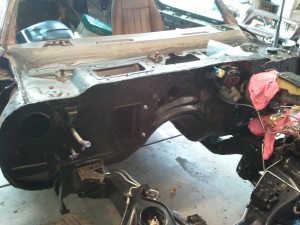
I had the glass guy come over yesterday to remove the front windshield. Over the next week the plan is to paint the metal dash portion black and get the firewall buttoned up, then schedule for the glass installation a week or so later.
Plan is to paint all the interior parts with SEM Color Coat landau black topped with SEM low luster clear where parts will see physical wear and/or sun.
What’s Next
Paint! The cold weather will be coming fast, so the plan is to paint all the remaining parts while I still can. Aside from the metal portion of the dashboard, I want to paint the steering box, inner fenders, front speaker mounts, various interior trim pieces and some spots on the floor boards.
On top of painting, I also need to fix the wiring for the dashboard. There are 5 wires that are cut that appear to go no where, I will need to get them resolved before I can install interior.
Hopefully this October I will have the gas tank, steering column, steering box, linkage, front sway-bar, dashboard and necessary interior installed. If I am lucky I may finally get the V8 assembled and in the car this October, but it is starting to look like November.
