It’s been another slow and steady month working on the Trans Am. It feels like I haven’t achieved much this month, but referring to my TODO list I’ve knocked out a lot of stuff.
Passenger Compartment
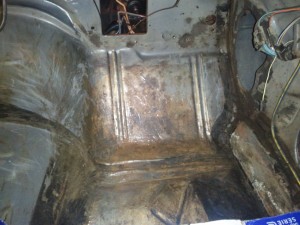
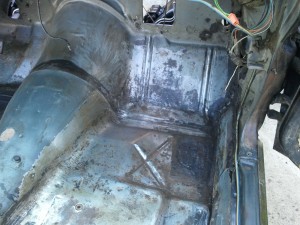
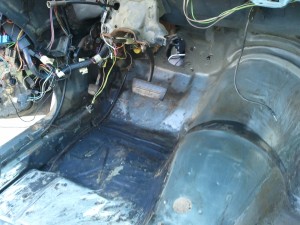
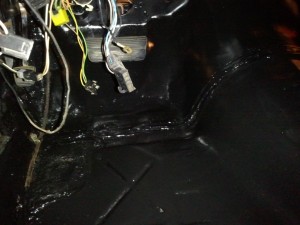
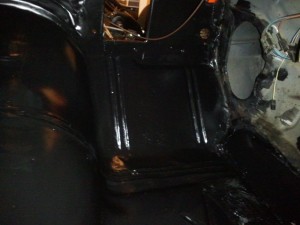
I’ve done a lot of work preparing the passenger compartment for the Interior. I removed surface rust on the passenger side floor using navel jelly, then used paint scrapers and removed all of the factory tar substance they coat the floors with. Once clean, I sealed the open seams with seam sealer then painted with Eastwood Encapsulator and Chassis black. Since no one will ever see this, I rolled it on with a foam roller. This process took a very long time, but the end result is a very nice clean rust-free floor. This was the last major spot where I found rust on this car, I assume it was caused by a leaking heater core at one time.
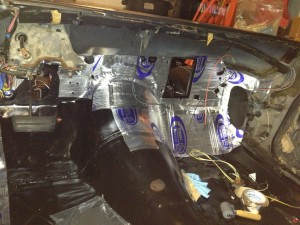
Last week I started installing sound deader and insulation (last photo). My plans have been evolving with how to install the deadener and the insulation. Essentially I’ve decided to put 100% coverage of the deadener on the firewall and first portion of the front floors. After that, I will only apply enough deadener to cover the center of each panel with 30-35% deadener coverage on each panel. I will then follow on top of that with aluminum backed closed cell foam for insulation. The reason I decided on 100% deadener on the firewall is because of space. I originally was going to just put enough deadener (30-35% coverage) to deaden sound then on top of that put closed cell foam, but as I got into adding the deadener, I discovered that the emergency brake, brake and throttle pedals that bolt to the firewall cannot tolerate all the thickness. The deadener is pretty thin in relation to the closed cell foam, so it makes sense to just use that 100% and tape all cracks/corners. The aluminum is doing most of the insulating, not the butyl rubber. The butyl rubber’s job is to deaden the sound, so it’s a little overboard on rubber on the firewall, but that’s ok. It’s key to tape all seams though with aluminum tape, and I’m doing that.
Gas Tank, Rear Tail Panel and Rear Bumper
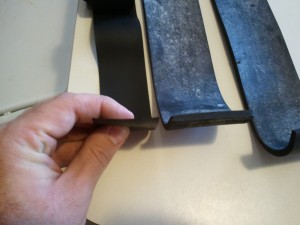
I got the gas tank installed, but not without a fight! I thought this would be an easy job, but it turned into a weekend job once I started having problems with fitment under the car. After a trip to teh store buying longer fasteners, I discovered that the top of the gas tank was not fitting within the chassis because the rubber strips I purchased for insulating the gas tank between the frane were too thick. After looking at the old tank and seeing that the strips were maybe 1/8″ thick at most, the nearly 1/4″ thick rubber I got was just pushing the tank too far away from the car making it impossible to install. After talking to my buddy about the problem, he gave me a roll of thinner rubber, which worked out perfectly! With the right rubber, the tank only took about an hour to install.
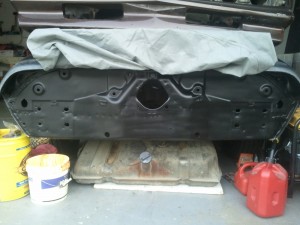
While I was painting the floors I also painted the rear tail panel of the car that way when filling the car with gas there’s nice clean black paint around the filler neck. (The car is originally a gray color and you could see the gray around the filler neck. I used VHT Chassis and Roll bar Satin paint since it is an epoxy paint. It’s not really meant for body panels, but it went on smooth and looks great, so why not!
In addition to all this, I installed the rear bumper so I could use it to help make brackets to install the rear taillights. One thing that bothered me is how the rear bumper cover attaches to the steel bumper. In 1978, they were riveted to the bumper, which was the case for the bumper I am using. Since I removed the bumper cover from the steel bumper, I would have to re-rivet these back. Modern cars, even 1979+ Firebirds, use plastic push-in rivets that make disassemble and reassembly much easier. I did some research and decided on some Ford style body rivets since they use a 1/4″ hole and can be unscrewed with a Phillips screw driver, make them reusable. The new rivets I’m using required me to drill out the holes in the bumper to 1/4″ diameter, no big deal but another step to say the least.
Now that I have the bumper on temporarily, I’ll be working on making adapters to mount the 78 taillights onto the 1981 rear tail panel. Because the taillight housings are different, I will need to both relocate the taillight studs and also modify the rear taillight wiring. More on the wiring in the next section.
Wiring and Shift Linkage
When I have 30 minutes here or there, I spend my time on little tasks. This month I got the shift linkage cleaned and all the bare metal painted, and the CD radio dash plate cut for the dashboard. Most importantly though, I got the under dash wiring figured out and labeled. The wiring under the dash has been butchered pretty badly by the previous owner. It was a very long process because some of the wires were cut and then re-soldered onto other wires. I eventually figured out what the previous owner did with the choke and check engine lights, but why they cut up the rear window defrost harnesses is beyond me. The radio harness was cut up as well. I’m still looking for pigtails for the rear defrost harnesses, but they are not important. I have found OEM replacement pigtail harnesses for the radio, that way if someday I wanted to install a factory radio I can. Sometime in the next week I’ll be repairing these wires.
I did some work test fitting the existing 1981 rear taillight harness with 78 taillights. I quickly found that in 79-81 they used the same bulb harnesses for the side marker lights for the tail lights. These use the standard 194 bulbs. To get the 1981 harness to work with 78 taillights, all I would need to do is convert 2 light sockets (one for each taillight) to the larger light socket that combines turn signal/brake/parking lights. I did a little searching and found you can buy 194 socket leads, currently popular items for folks who do taillight LED conversions. So for $4 for 2 leads, and another $10 for 2 new Dorman tail light pigtails, I’ll be able to “plug-in” an adapter to my existing 1981 wire harness without modifying my existing wiring. This means I can easily swap the taillights/bumper back and forth without removing the wiring!
What’s Next
Finish installing insulation/deadener in the passenger compartment, repair under dash wiring, followed by the carpet, dashboard and center console. That should be enough interior parts to be able to test all the electrical as well as start the motor for break-in. The electrical will take some time to work on, but luckily most of the work I can do in the house (basement) when ever I have 30 minutes or an hour of time here/there.
