Another month has come and gone, and progress on the Trans Am has come to a crawl. Below is an outline of everything that has been happening since in May, 2012.
Brakes – Part 2 of 3
Putting the brakes back together has become a bigger challenge than I first thought. As of this blog post, I have all of the new brake lines installed, brake booster installed, front brakes installed, and the remaining parts ready to bolt on. Once the rear calipers and hoses are installed, I can bench bleed the master cylinder, bolt on the remaining lines to the master cylinder, bleed the brakes to each caliper then re-attach and adjust the emergency brake. Then I’m done with the brakes!
Rear Brake Line Conversion
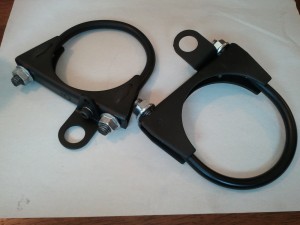
Converting the rear brake lines to use hoses between the brake lines and calipers has become quite the challenge. I put together this well thought out plan to use 3″ exhaust U clamps with brake hose to line brackets attached and painted them satin black.I then bought 12″ long run of bendable pre-flared brake line from Napa and bent it to the shape needed for how I wanted the brake lines in the back. I then took the brake line to The Right Stuff in Westerville and a couple hours later they made me a stainless steel version complete with stone guard stuff coiled around the brake line.
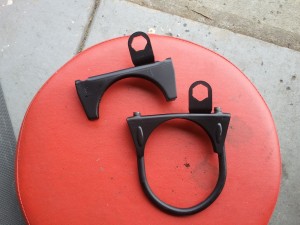
Two weekends ago I went to install the U clamps I made to find out that the rubber hoses I got require a special hex type key be shaped into the holes for the brake hose to lock itself into. I had to file the hex shapes into the brackets then repaint them, setting me back another couple days. Check out the before and after photos. Yes my filing technique is poor, but they work. No one will see the rough inside portion as the brake line and clip will cover my poor filing skills.
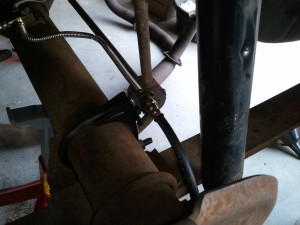
Last weekend I finally got to install the rear brake lines and hoses. It looks really sharp now and it will make servicing the rear calipers a lot easier.
Brake Booster and Calipers Painted
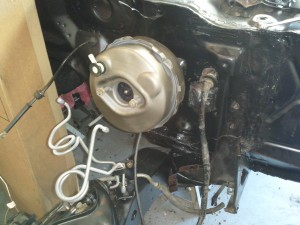
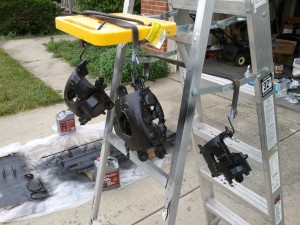
I painted the brake calipers and brake booster!
I was going to try to paint the brake booster gold with spots of green, red and chrome to try to replicate the look of Yellow Zinc / Gold Cadmium plating. After looking at some expensive paint kits to try to replicate the look and seeing its poor results, I decided to paint the brake booster the same cast color finish that it had out of the box. I used the same Dupli-color engine cast iron gray paint that I used for the tie rods and center link. It came out quite well.
I painted the calipers with VHT primer followed by VHT black satin caliper paint. They came out quite nice as well.
Fuel and Brake Lines Bent and Installed
In addition to installing the brake lines, I got some bendable 1/4 and 5/16 tubing and bent my own fuel return and vapor lines. I was going to buy new fuel line but after assessing the lines condition under the car, I decided to keep the old fuel line and just replace the engine bay portion. The fuel line at the engine bay side is just under 3 feet long and has some sharp 90 degree angles. I got some bendable 3/8 tube from The Right Stuff with 2 feet of rock/stone guard and bent my own fuel line for the engine bay. All the lines came out quite nice.
Installing the pre bent brake lines sadly was not as easily as I had hoped. The pre-bent kits require a lot of massaging and re-bending. I’ve walked away from the experience with the idea that next time I’m going to buy a flaring tool and bend my own brake lines.
Front Brakes Installed
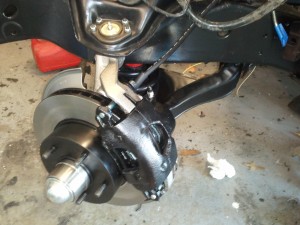
On the 4th of July (yesterday) I had some time to put together the front brakes. Everything went together without a hitch and looks good too!
Other Firewall Stuff
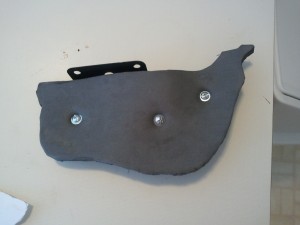
Aside from the brakes and fuel lines, I’ve also been slowly reassembling the firewall. The wiper arms that tuck into the cowl area are installed and I also fitted a new seal to separate the fresh air side of the cowl that supplies air to the heat/AC ventilation with the rest of the cowl. The material is expensive if purchased by the foot from appropriate venders. I found that the same material is used for safety mats that you can puzzle together for your garage floor. So I went to my local Freight store and picked up a set of 4 for less than $10, and cut one up to make my seal with. It worked quite well. Here’s a picture of the seal I made bolted to the plate that divides the cowl for the fresh air ventilation side.
What’s Next
Hopefully in the next week or two I will get a good 4-6 hours to finish the brakes on the car. Once the brakes are done and the car is back on all 4 wheels, I will be putting all my effort finish assembling the motor! If I don’t run into anymore snags I have the motor assembled and in the car by August.
